Having had a lot of fun with the papercrafting on the Cricut Maker 3, it was time to move on to the next challenge – vinyl!
When it came to cutting the vinyl, the Cricut Maker 3 was amazing – the process of cutting was seamless, and I encountered absolutely no issues. The same cannot be said of designing the project using the Design Space app. I should note at this point I have been using the design space mobile app on a Pixel tablet – not the PC version.
One thing which surprised me was that there was no easy way to make a new canvas – you would think a single click “new canvas” button would be a logical thing to include, but alas, no. It took quite a few minutes of hunting around to banish my previous project and create a new blank canvas for my vinyl adventures.
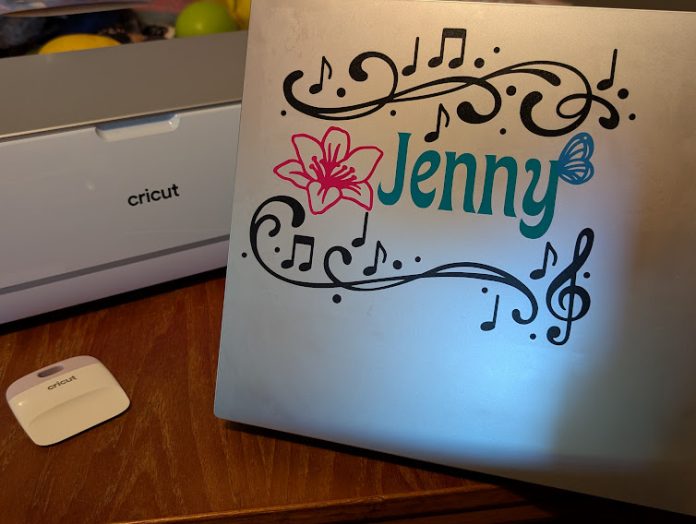
This project is for our daughter Jenny, so she joined me in choosing elements from the design space and then using them to create her preferred design.
Perhaps because I have been an avid user of Photoshop over the years, I have created one of my problems myself, as how Adobe treats a ‘layer’ and how the Design Space treats a ‘layer’ are very different.
Even when unattached the layers in the vinyl project didn’t separate onto different panels for cutting, which I wanted as I was planning on using multiple vinyl colours. I’m not sure if this is what you are supposed to do, but hiding every layer except one did allow me to just cut out the one I wanted and change vinyl colours in between. It made for a lot of going in and out of the project and setting up lots of separate cuts however.
I do wish there was a simple preview of what your design will look like, currently you have to go through the making process, clicking the ‘make it’ button, choosing a material load type and preparing the cut in order to see what it’s going to be output.

Vinyl cutting is a bit wasteful, a fair bit of vinyl ends up in the bin, but unfortunately, it’s the nature of the process.


If you are careful about cutting out your designs or use a piece of vinyl which is exactly the right size you can waste less, but you run the risk of the design being cut outside the edges of the vinyl and losing some of it – my first attempt at the flower in Jenny’s design illustrated this to me – I thought I had cut the piece of vinyl to size only to lose the tip of a petal. It looks great on my kitchen cupboard though!
Once the designs were all cut out, I had a great deal of fun using the hook tool to remove the excess vinyl from the designs, or weeding, as it’s called by those in the know.

The next step was applying transfer tape over the design and rubbing it firmly or ‘burnishing’, and peeling off the backing. Carefully lining up the design and once again burnishing it so it sticks to the intended target and also comes smoothly off the transfer tape. There is a bit of technique involved with the removal of firstly the backing and then the transfer tape, but it’s pretty intuitive and anyone who has ever peeled a sticky label off a jar or box will get it straight away.
I was ultimately successful, and Jenny is headed off to high school <eep!> with a customised laptop she adores!

I’m really enjoying exploring what the Cricut Maker 3 can do, if you enjoyed this article you can read my first post about the Cricut Maker 3 here. I’m moving on to the next project – I’ll keep you posted!


